
KDS Setup Guide NZ: Your 7-Step Plan for a Smarter Kitchen
KDS Setup Guide NZ: Your 7-Step Plan for a Smarter Kitchen
The lunch rush is in full swing. The printer is spitting out a continuous stream of dockets, a server is shouting a modification for table five, and a chef is trying to decipher a handwritten order stained with sauce. A lost ticket means a comped meal and an unhappy customer. This controlled chaos is the daily reality for many NZ hospitality businesses.
You already know there's a better way. You've heard about Kitchen Display Systems (KDS) and you're sold on the 'why'. But the 'how' feels overwhelming. How do you plan it? What will it cost? How do you get your team on board without causing a mutiny?
This is not another sales pitch. This is your practical, step-by-step KDS setup guide. We'll walk you through the entire process, from planning on paper to launching a calmer, more efficient kitchen. Because as research from Cornell University's School of Hotel Administration highlights, the right technology leads to faster service, higher quality, and ultimately, a healthier bottom line.
Why Now? The Urgent Case for a KDS in NZ's Hospitality Climate
Implementing a new system can feel like a big step, but in New Zealand's current economic climate, it's a strategic necessity. A KDS isn't just a gadget; it's a powerful tool to protect your profit margins.
According to the Restaurant Association of New Zealand, the industry is facing significant pressure from rising costs. A paperless kitchen order system directly tackles these challenges by:
- Reducing Waste: Clear, digital orders eliminate errors from illegible handwriting or misheard instructions, meaning fewer mistakes and fewer remade dishes.
- Improving Speed: Digital tickets appear instantly at the correct station, cutting seconds from every order. Over a busy service, this adds up to faster table turnover and more customers served.
- Boosting Efficiency: By automating how orders are organized and displayed, your team spends less time managing paper and more time cooking. This helps you get the most out of every labour dollar spent.
Controlling expenses is critical for profitability. A KDS is a direct investment in operational efficiency that pays for itself. For more on managing expenses, see our Complete NZ Guide to Beverage Cost.
Step 1: Plan Your Perfect KDS Setup (The Blueprint)
Before you spend a single dollar, you need a blueprint. This planning phase is the most critical step and will save you immense time and money later. Don't skip it.
Map Your Kitchen Workflow
First, understand how orders currently move through your kitchen. This isn't about how you think it works, but how it actually works during a busy service.
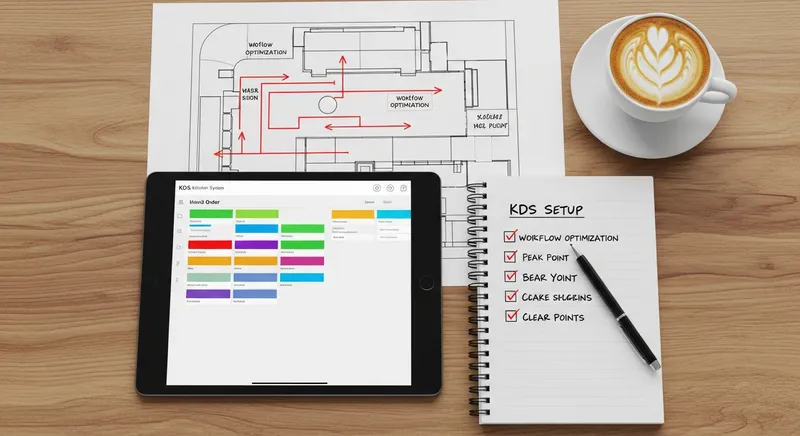
Actionable Tip: Grab a copy of your kitchen's floor plan (or sketch a simple one). Watch your team during a peak period and physically draw lines showing the path of an order. Where does the docket go first? Which stations need to see it? Where do completed items wait before going to the customer? This visual map will immediately highlight bottlenecks and show you where you need screens.
Choose Screen Locations (Prep, Expo & More)
With your workflow map in hand, you can decide where to place your screens for maximum impact. There are two main types of screens:
- Prep Screens: These are for the stations doing the cooking (e.g., Grill, Fry, Pantry). They show only the items relevant to that station.
- Expo (or Pass) Screens: This screen sits at the pass where orders are assembled. It shows all items for an order, allowing the expeditor to coordinate, check for quality, and ensure everything goes out together.
Based on your map, decide on your setup. A small cafe might only need one screen for the barista and one for the kitchen. A large restaurant may need multiple prep screens and a dedicated expo screen.
Select the Right KDS Hardware for NZ Kitchens
Commercial kitchens are harsh environments. Your hardware needs to withstand heat, grease, steam, and the occasional knock. You have two main options:
- Consumer Tablets (e.g., iPad): A cost-effective choice, but they must be housed in a rugged, sealed, kitchen-grade case to protect them from damage and grease. Lazygrid's system is fully compatible with any iPad running iPadOS 15 or newer, allowing you to use hardware you may already own.
- Purpose-Built KDS Screens: These are more expensive upfront but are designed specifically for kitchen life. They are often fanless, water-resistant, and built to handle high temperatures.
Don't forget the bump bar. This is a physical keypad that allows kitchen staff to 'bump' an order to the next stage or clear it from the screen with a quick tap. In a fast-paced, greasy environment, using a bump bar is far more efficient and reliable than trying to use a touchscreen.
Step 2: Configure Your KDS & POS Integration
Now we move from the physical to the digital. This is where you program the 'brains' of your system to match the workflow you just mapped out.
KDS POS Integration NZ: The Non-Negotiable Check
This is critical: Your Kitchen Display System and your Point of Sale (POS) system must be perfectly integrated. They need to speak the same language. A non-integrated system where you have to enter information twice is worse than using paper.
This is why an all-in-one solution is often the best choice. Lazygrid's POS, for example, comes with a fully integrated KDS, eliminating any risk of compatibility issues or extra fees for 'connectors'.
KDS Routing by Item: The Key to Automation
This is the most powerful feature of a modern KDS. Item routing automatically sends specific parts of an order to the correct kitchen station. This eliminates the need for servers to run around or for chefs to shout across the kitchen.
Here's how it works in practice:
A customer orders a 'Classic Burger with Fries'. When the order is entered into the POS:
- The 'Burger Patty' item is automatically routed to the Grill Station screen.
- The 'Fries' item is automatically routed to the Fryer Station screen.
- Both items appear together on the Expo Station screen for final assembly.
Lazygrid KDS: Key Features at a Glance
- Automatic Item Routing: Send menu items to specific stations instantly.
- Robust Offline Mode: Your kitchen keeps running even if the internet goes down.
- Bump Bar & Touchscreen Support: Use what works best for your team's workflow.
- Real-Time Analytics: Track ticket times and performance to make data-driven decisions.
For an overview of top systems, check out our guide to the Best POS Systems for NZ Bars & Restaurants.
Step 3: Budget Your KDS Project in NZD
Cost is a major concern, and many providers are not transparent. Let's break down the real costs you can expect, all in NZD, to address that uncertainty head-on.
Your total investment will be made up of a few key parts:
- Software: This is typically a monthly subscription fee. Be wary of providers who charge extra for a KDS module. For context, Lazygrid's plans include KDS functionality without a separate charge. The Standard Plan ($59/month) and Premium Plan ($149/month) both come with a powerful, built-in KDS, making it an affordable, all-in-one solution.
- Hardware: This is your main upfront cost.
- Screens: A consumer tablet with a rugged case might cost $500 - $800. A purpose-built KDS screen can be $1,500 or more.
- Bump Bars: Expect to pay between $150 - $300 per unit.
- Mounts & Cabling: Don't forget the cost of securely mounting screens and running network cables. Budget $100 - $200 per screen.
- Installation: If you're not tech-savvy, you may want to pay for professional installation. This can range from a few hundred to over a thousand dollars depending on complexity.
Actionable Tip: Create a simple spreadsheet to budget your project. List each potential cost item and get quotes. An all-in-one system simplifies this by combining software costs into one predictable fee. A good POS system should also help with your accounting, like in this Xero POS Integration NZ guide.
Step 4: Master KDS Staff Training
Your team can make or break your KDS implementation. The goal is to make them feel empowered by the new technology, not threatened by it. Address the fear of change head-on.
Frame the KDS as a tool that will make their jobs easier: no more lost dockets, fewer order mistakes to fix, and a calmer, quieter kitchen. Then, roll it out with a clear training plan.
Your Mini-Training Plan:
- Announce the 'Why': Gather your team and explain why you're making the change. Focus on the benefits for them: less stress, fewer errors, and smoother services.
- Sandbox Session: Set up the system in a 'training mode'. Let your team play with it, enter fake orders, and bump tickets without the pressure of a live service.
- Mock Service: Before going live, run a mock service with a few staff members acting as customers. This is a dress rehearsal that builds confidence.
- Create Quick-Reference Guides: For the first few weeks, have a simple, laminated, one-page guide at each station showing how to perform the main functions (e.g., 'How to view modifications', 'How to bump an order').
Identify one or two tech-savvy team members to be your 'KDS Champions'. Give them extra training so they can help their colleagues during a busy shift.
Step 5: Go Live, Ensure Compliance, and Measure Success
With your planning, configuration, and training complete, it's time to go live.
Common Mistake to Avoid: Going live on a Friday or Saturday night. The pressure is too high. Always launch on your quietest day, like a Tuesday afternoon, to give your team space to learn and adapt without stress.
Beyond efficiency, a KDS is also a tool for compliance. A KDS creates a perfect digital record, which supports your Food Control Plan (FCP) by helping you adhere to guidelines from the Ministry for Primary Industries (MPI). It does this by:
- Displaying Timers: Shows how long an order has been waiting, helping with food safety and quality control.
- Highlighting Allergies: Special dietary notes can be displayed in a different colour, ensuring they are never missed.
- Providing a Digital Record: Creates an auditable trail of when orders were received and completed.
Finally, measure your success. Track these key metrics before and after you implement your KDS:
- Average Ticket Time: How long from order entry to completion?
- Order Accuracy Rate: How many dishes do you have to remake per service?
- Table Turn Time: How long does a table stay occupied?
Seeing these numbers improve will prove the value of your investment. For more on compliance, explore our NZ Food Safety Compliance guide.
Step 6: Tailor Your KDS for Your Business Type
A one-size-fits-all approach doesn't work. Here's how to think about a KDS setup for different NZ businesses:
- For Small Cafes: Speed and simplicity are key for the morning rush. A simple two-screen setup is often perfect: one for the barista to manage coffee orders, and one for the kitchen for food items. With modern hardware, this two-screen setup can be achieved for under $2,000 upfront. For more ideas, see our guide to the best POS systems for NZ cafes.
- For Food Trucks: Your priorities are durability and a small footprint. A system based on iPads in rugged cases is ideal. Ensure your system, like Lazygrid, has a robust offline mode, as festival or market internet can be unreliable.
- For Restaurants & QSR: Your needs are more complex. A multi-station setup with screens for Grill, Fry, and Pantry, plus a dedicated Expo screen for coordination, is a common and effective model. Integration with your online ordering platform is non-negotiable. Lazygrid's KDS seamlessly pulls orders from your website and third-party apps directly to the kitchen via your QSR & Takeaway POS system.
Step 7: Your KDS Questions Answered
We've compiled answers to the most common questions business owners have when considering a KDS.
What is the average cost of a KDS in New Zealand?
There's no single price tag. A good estimate involves upfront hardware costs ($1,500 - $3,000 for a small venue) and ongoing software fees. With an all-in-one system like Lazygrid, this is a single, predictable fee starting from $59/month, which includes both POS and KDS software.
Can I use an iPad or Android tablet for my KDS?
Absolutely. Using consumer tablets is a popular and cost-effective way to get started. It's crucial that you invest in a kitchen-grade, rugged protective case. A standard case won't cut it against the heat and grease of a commercial kitchen.
What happens to my kitchen orders if the internet goes down?
This is a critical question. A well-designed KDS like Lazygrid has a robust offline mode. This means that if your external internet connection fails, the system uses your local Wi-Fi network to keep the POS terminals and KDS screens communicating. Orders continue to flow to the kitchen without interruption.
How long does it take to set up a KDS system?
A realistic timeline for a small-to-medium business is about one week. This breaks down into a few hours for physical installation, a day for menu and workflow configuration, and a few short sessions for staff training. The key is not to rush.
Do I need a separate KDS for every station in my kitchen?
Not necessarily, but the real power of a KDS is unlocked when you match screens to your workflow. If you have distinct stations (e.g., grill, fry), giving each a dedicated screen dramatically improves flow. Your workflow map from Step 1 will provide the definitive answer for your specific layout.
From Chaos to Calm: Your Next Step
Implementing a Kitchen Display System is a project, but it doesn't have to be an overwhelming one. By following this step-by-step guide- Plan, Configure, Budget, Train, Launch, Tailor, and Learn- you can transform your kitchen from a source of stress into a streamlined, efficient, and more profitable operation.
A well-implemented KDS brings a sense of calm and control, allowing your talented team to focus on what they do best: creating fantastic food.
Feeling more confident about your KDS project? See exactly how it works. Book a free, no-obligation demo of the Lazygrid POS and KDS, and let our NZ-based team show you how to streamline your kitchen.